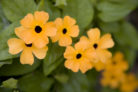
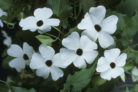
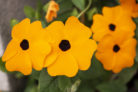
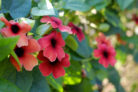
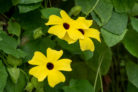
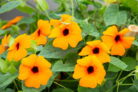
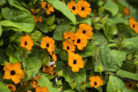
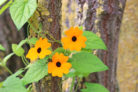
Black-eyed Susan vines are fast-growing climbers that put on an absolutely charming floral show. They’re incredibly versatile—I love using them to create a lush, colorful privacy screen on a porch or trellis. Plus, starting your own young plants at home is a total budget-saver. Here’s the lowdown on how to get them growing.
Choosing Your Method
To propagate this African native, you’ve got two main options: starting from seeds (either saved or store-bought) or taking cuttings. If you go the cutting route, your new plant will be a genetic twin of the parent. If you’re looking for a specific new color or want to grow a whole bunch of plants at once, seeds are definitely the way to go.
The Best Timing for Propagation
If you’re starting from seed, you’ll want to get a head start by starting them indoors on a sunny windowsill between February and April.
For cuttings, you have two windows of opportunity. The first is from January to March, and the second is from August until you bring your plants in for the winter. I prefer starting in the spring because the natural light is improving, and the plants can move outside by mid-May to bloom that same summer. If you wait until the second half of the year, you’ll need to overwinter the young plants in a bright spot that stays around 50°F (10°C).
Sowing Seeds
Aside from the fact that Black-eyed Susan seeds can take up to three weeks to germinate, the sowing process is pretty straightforward:
- Fill starter pots with a good seed-starting mix.
- Cover the seeds only lightly with soil.
- Keep the soil consistently moist.
- Place them in a bright spot at about 65°F (18°C).
- Once they have two pairs of true leaves, transplant them (I like to put three to a pot for a fuller look).
- Move them to the balcony or plant them in the garden after the last frost in mid-May.
Pro Tip:
Pinch off the tips of the shoots early on. This encourages the vine to branch out and get bushy rather than just growing one long, skinny stem.
Propagating from Cuttings
- Choose green, non-woody stems. It’s a good idea to take several cuttings at once, just in case a few don’t take root.
- Strip the lower leaves off each cutting.
- Fill a large pot with seed-starting soil mixed with a little sand for extra drainage.
- Stick the cuttings into the soil and give them a good misting.
- Cover the pot with a clear lid or a plastic bag to create a mini-greenhouse.
- Place the pot in a bright, warm location.
- Make sure to vent the cover every day to let in fresh air.
- As soon as you see new growth, it’s time to transplant. You can put two or three cuttings in one large pot for a nice, dense look.
- Don’t forget to add a trellis or support to the pot.
- Wait until mid-May to move them outside. Introduce them to the sun gradually, and make sure their permanent location isn’t too shady—otherwise, your Black-eyed Susan might not bloom!