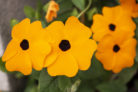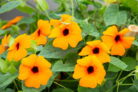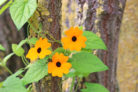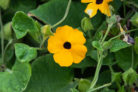
Can’t get enough of those cheerful Black-eyed Susan vine blooms? Or maybe you’re looking for a unique, edible addition to your summer salads? Either way, I’ve got great news: if you want more of these beauties in your garden, you can easily propagate them yourself at home with just a little bit of effort.
Seeds or Cuttings? Both Work Like a Charm!
The secret is out—there are two main ways to grow your own version of this African native. Both methods have a pretty high success rate, so your choice really depends on what you have on hand. Do you already have a plant to take cuttings from? What season is it? Do you have the indoor space to start seeds? Let’s break down your options.
Starting from Seed: Homegrown or Store-Bought
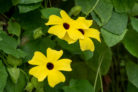
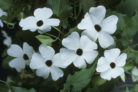
Even here, Black-eyed Susan vines produce viable seeds. If you already have a plant, just leave a few spent blooms alone so they can develop seed pods. Once the pods are dry, they’ll pop right open to reveal the seeds. If you’re looking for a specific new color or don’t have a plant yet, you can easily find seeds for sowing at your local garden center or online.
- The best time to start is February through April.
- Use seed-starting mix and small pots with drainage holes.
- Sow the seeds and cover them with a light layer of soil.
- Place them in a bright spot at about 65°F (18°C).
- Prick them out (transplant) once they have two pairs of true leaves.
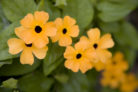
- For a fuller look, plant three seedlings together in one pot.
- Pinch off the tips of the shoots to encourage branching.
- Move them to the balcony or garden bed after the last frost in mid-May.
Pro Tip:
Don’t panic if you don’t see sprouts right away! Black-eyed Susan seeds are notoriously slow starters. It can take up to three weeks before you see that first pop of green.
Propagating from Cuttings
If you’ve successfully overwintered your plant indoors, you can take cuttings from January to March. The perk of doing it early in the year is that your new plants will be ready to head outside by mid-May. You can also take cuttings in August, but keep in mind those won’t bloom until the following year.
- Take cuttings from green, non-woody vines.
- Strip off the bottom leaves.
- Stick them into well-draining seed-starting soil.
- Keep the soil moist and cover with a plastic bag to hold in humidity (just remember to vent it daily!).
- Choose a warm, bright location.
- Once you see new growth, transplant them into larger pots.
- Group three cuttings together for a lush plant.
Pro Tip:
If you don’t have room for a trellis on your balcony, try planting your young starts in a hanging basket. They look absolutely stunning when the vines are allowed to trail downward!