In smaller gardens, there isn’t always room for hollyhocks to go wild and take over. But here’s a pro tip: if you plant these beauties in containers, you can enjoy their classic charm even in tight spaces. Here is everything you need to know to make it happen.
How Hollyhocks Grow
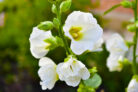
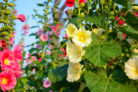
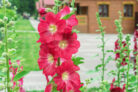
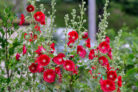
Hollyhocks are part of the mallow family, and when they’re planted in the ground, they can tower up to ten feet tall! They also love to spread out, which is why many gardeners hesitate when it comes to planting hollyhocks. However, growing them in a pot is a fantastic way to naturally limit their size and keep them manageable.
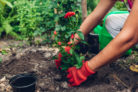
To get started, you’ll need a nice, large pot. You want something deep enough to give the roots plenty of room to anchor the plant so it doesn’t tip over once it gets tall. You’ll also need to pick the perfect spot for your hollyhocks. They can be a bit picky, so meeting their basic needs is the secret to a healthy plant.
How to Plant Your Potted Hollyhocks
Fall is the best time to get your seeds started. Fill your chosen container with a nutrient-rich potting mix, making sure the soil stays nice and airy rather than packing it down too tight. Next, scatter your hollyhock seeds on top. Just keep in mind that patience is key here—hollyhocks usually won’t bloom until their second year.
Where to place your container:
- In a bright, sunny spot
- Somewhere protected from heavy winds
- In a place where they have a bit of “elbow room”
Cover the seeds with just a light dusting of soil and keep the mix consistently moist but not soggy. If you keep them around 70°F (20°C), you should see sprouts within about three weeks. Make sure the pot stays in a bright location. Once the seedlings are sturdy enough, you can thin them out or move them to their permanent home. When grown in a container, your hollyhocks will stay a bit shorter and more compact than their cousins in the flower bed, making them perfect for patio life!