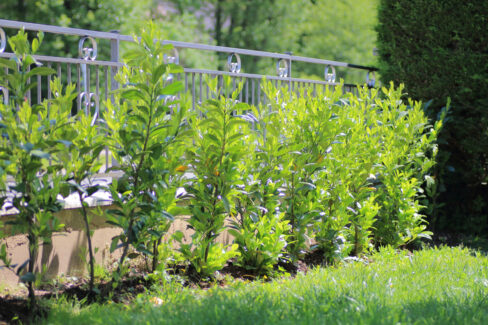
If you want a cherry laurel hedge that’s lush, full, and healthy, getting the spacing right from the get-go is key. If you pack them in too tight, their roots will start fighting for territory underground. On the flip side, space them too far apart and you’ll be staring at gaps for years. Here’s how to find that “Goldilocks” zone for a beautiful, privacy-providing hedge.
Why Spacing Matters More Than You Think
Giving your plants enough elbow room ensures that each root ball has the space it needs to soak up nutrients and water without competing with its neighbor. When you plant a laurel hedge, overcrowding is a common mistake. If the roots are cramped, they can’t do their job, which leads to stunted growth and thin, lackluster foliage. But don’t go too far the other way—if you’re too generous with the space, you might end up with a “see-through” hedge rather than a solid green wall.
How to Plan Your Planting Distance
The best way to calculate spacing is based on the current height of the plants you’re putting in the ground:
- Laurels up to 3 feet (100 cm): 3 plants per yard
- Plants between 3 and 4 feet (100–120 cm): 2.5 plants per yard
- Plants over 4 feet (120 cm): 2 plants per yard
Basically, the smaller the starter plant, the more you can fit into a linear yard. Once your laurels hit that 4-foot mark, you really want to stick to just two plants per yard. Don’t worry about it looking sparse at first—larger plants naturally branch out more aggressively, and they’ll fill in that green screen before you know it.
Easier Maintenance Down the Road
Getting the spacing right at the planting site doesn’t just help the plant grow—it makes your life easier, too! A well-spaced hedge is much simpler to prune and shape than one that’s a tangled mess. It also makes fertilizing a breeze since you can actually reach the soil around the base. For the best results, I always recommend sticking with organic options like compost or well-aged manure to keep those laurels happy and green.