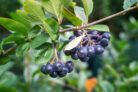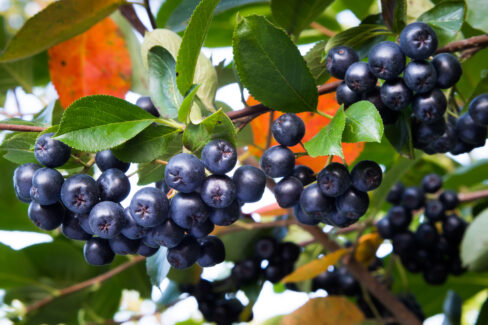
Aronia berries (also known as chokeberries) are absolute nutritional powerhouses, which makes them a fantastic addition to any backyard garden. Plus, the shrubs are incredibly hardy and low-maintenance. If you’re looking to add some superfoods to your landscape, here’s everything you need to know about growing Aronia!
When is the best time to plant?
The sweet spot for planting Aronia is in the fall, ideally once other trees have dropped their leaves and the first frost is just starting to show up. This gives the shrub all winter to get its roots firmly established so it can burst with growth in the spring. Another perk of fall planting? You’ll likely see plenty of blossoms the following year and a bountiful harvest by the next autumn.
Planting bare-root shrubs
You’ll often find Aronia sold as “bare-root” shrubs—meaning they arrive without a pot or soil. These can easily be planted in December, or even January and February, as long as temperatures don’t dip below 14°F (-10°C). Just make sure to protect the exposed roots from drying out, frost, or direct sun before they get in the ground. You’ll want to wait for a day when the ground isn’t frozen solid (usually after a few days of temperatures staying above 23°F).
Before you put bare-root shrubs in the ground, give them a quick trim. Remove any damaged shoots and cut the healthy ones back by about half. It’s also a good idea to lightly prune the main root and remove any broken bits to encourage fresh growth.
Tips for container-grown Aronia
If your Aronia comes in a pot, you’ve got more flexibility—you can plant these pretty much year-round. It’s best to get them in the ground shortly after buying. Unlike bare-root plants, you don’t need to prune the roots; just snip off any damaged root ends or broken branches. Look for a plant that already has four or five strong shoots to ensure it takes off well once it’s in your garden.
Your step-by-step planting guide
- First, pick out the perfect spot. Keep the shrub’s mature size in mind and space them about three to six feet apart.
- If you’re planting them as a hedge, a tighter spacing of about 20 inches (0.5 meters) works best.
- Aronia has deep roots, so dig a hole that’s nice and deep to accommodate them.
- If you want to prevent the shrub from spreading via suckers, you can install a root barrier around the planting area.
- Place the shrub in the center of the hole and fill it back in with loose soil.
- Press the soil down firmly with your foot and give it a good, long soak.
- Keep an eye on the weather—if it’s a dry spell, make sure to water it regularly for the first few days.
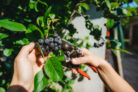
Ways to use Aronia in your landscape
Aronia plants are perfect for hedges. They provide great privacy, and you get the bonus of edible berries in the fall! For a beautiful “edible hedge,” try mixing them with serviceberries, Cornelian cherries, medlars, or sloe.
If you’re a balcony or patio gardener, Aronia also does great in large containers. Just remember that potted plants need more frequent watering and a nice sunny spot to thrive.
Soil and sun requirements
Aronia isn’t very picky when it comes to soil. Whether you have sandy, loamy, or silty soil, it’ll likely be happy as long as the pH isn’t too alkaline.
Regarding the climate and location, the main thing is sunshine! Aronia loves a sunny spot and thrives with a bit of humidity and soil moisture. It’s tough enough for rocky slopes or areas with a high water table, and it can even handle high altitudes. Just keep in mind: if your Aronia is stuck in the shade or doesn’t get enough water, it won’t grow as vigorously and you’ll end up with a smaller harvest.