Since camellias can be a bit finicky to start from scratch, most people just head to the nursery and buy a potted plant. But if you’re up for a fun gardening challenge, you can actually grow them yourself from cuttings or seeds! Just a heads-up: both methods require a healthy dose of patience.
Cuttings vs. Seeds
Which route should you take? It’s totally up to you! If you go with cuttings, you’re essentially “cloning” your plant, so the new camellias will be identical to the parent. If you start from seeds, you might end up with a little surprise, as they don’t always turn out exactly like the original plant.
The Best Soil for the Job
Cuttings and seedlings are pretty picky about their soil. Many pros actually recommend using Seramis (clay granules) for starting them. Why? Because these little beads don’t rot, break down, or get waterlogged. Plus, they’re sterile (no nasty soil fungi!), hold moisture well, and let the roots breathe—all of which makes your life a lot easier.
Growing Camellias from Cuttings
Taking cuttings is the most popular way to propagate camellias. The sweet spot for this is usually late June during the plant’s dormant phase, right when the bark starts turning an olive-green color. You can take cuttings later in the year, even into winter before they bloom, but the wood will be harder, which makes it tougher for roots to form.
How to Take Your Cuttings
You have two main options here:
- Tip cuttings (the end of a shoot with about 3 leaves)
- Stem cuttings (a section from the middle of a shoot with 2 to 3 leaves)
Make a diagonal cut just below a leaf node, and then pluck off that bottom leaf. If you’re tight on space in your pot, you can even trim the remaining leaves in half. Pro tip: peel back a tiny sliver of bark at the bottom of the cutting to create a larger “wound” area—this actually helps more roots grow!
If you’re taking cuttings from different varieties, just grab a marker and write the name directly on one of the leaves so you don’t get them mixed up.
Planting Your Cuttings
Follow these steps to get them started:
- Dip the ends in an anti-fungal treatment before planting.
- Tuck them into your Seramis.
- Place them in a mini indoor greenhouse (or just pop a clear plastic bag over the pot).
- Use a heating mat (about 12 watts) to keep things cozy.
- Keep the substrate consistently moist.
- Set up a grow light (1,000 lux) just above the greenhouse. They need “long days”—at least 16 hours of light.
How long they need to stay in this spot depends on the variety. Some might take up to nine months to root! Once they’ve finally established roots, wait for two or three new growth spurts before you expect any blooms.
Growing Camellias from Seed
You’ll know camellia seeds are ready to harvest when the seed pods start to crack open. By then, the seeds should have a hard, brown outer shell.
Step-by-Step Seed Starting
- Place the seeds in small pots of Seramis with the “eye” facing downward.
- Keep the granules slightly damp (a spray bottle works great).
- Be patient! It can take up to six months for the first little leaves to appear.
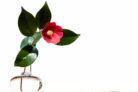
- Once they sprout, gently lift the seedling out of the pot.
- Snip off the very tip of the root (this encourages branching).
- Disinfect the remaining root with an anti-fungal agent.
- Dust the cut end with charcoal powder to prevent rot.
- Replant the seedling in fresh Seramis, making sure the seed shell is resting right on the surface.
From here on out, you’ll care for them just like you would when growing from cuttings. Happy planting!