For the most part, pines are pretty low-maintenance and don’t actually require regular pruning. However, there are definitely times when breaking out the saw makes sense for the health and look of your tree. If you’re wondering how to trim your pine without stressing it out, you’ve come to the right place. Here’s the lowdown on how to get it right.
The Best Time to Prune
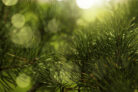
Unlike fruit trees or leafy hardwoods that we usually tackle in early spring, the pine tree is a bit more flexible. You can actually prune these evergreens in the fall. Because pines are so resinous, they produce a lot of sap that acts like a natural bandage, sealing up cuts quickly to protect against pests and weather.
That said, spring pruning is also an option. You’ve got a pretty wide window to work with, but you still need to be careful. If you aren’t mindful of your technique, you could accidentally invite fungal issues or increase the overall risk of disease.
Thinning Out vs. Limbing Up
One thing you’ve got to remember: pines won’t sprout new growth from old wood where you’ve made a cut. This means whatever you prune away is gone for good, and you’re permanently shaping (or reducing) the tree’s silhouette. Keep that in mind before you start sawing! Generally, you’re looking at two main methods.
Thinning is all about removing specific branches to open things up. This keeps the crown from getting too dense and prevents branches from rubbing against each other. It’s also a great way to clear some space away from your house or let more sunlight reach the plants growing underneath the tree.
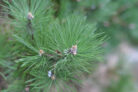
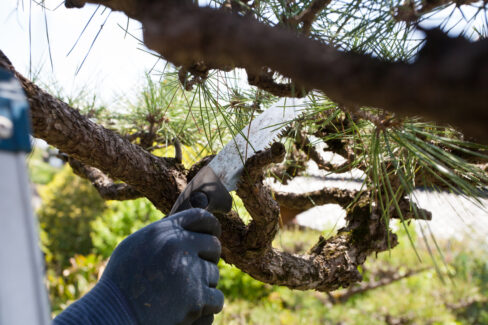
Limbing up (or “limbing out”) is a bit different. Instead of thinning the top, you’re removing the lower side branches to expose more of the trunk. This gives the tree a more “elevated” look. Just a heads-up: the tree will likely “bleed” quite a bit of resin right after you do this, but don’t panic—it’s totally normal.
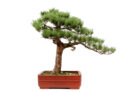
Topiary and Training
Then we have “training” and “topiary” (shaping). Training is usually done when the tree is very young—think of it like starting a bonsai project. Shaping, on the other hand, can be done on older trees, but just remember that an old pine won’t “bounce back” with new growth to fill in gaps. Once you cut it, that’s the shape it’s going to have.
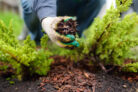
What you’ll need for the job:
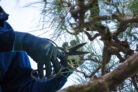
- Heavy-duty gardening gloves
- A sharp pruning saw
- Disinfectant (rubbing alcohol works great)
- Tree wound sealer (optional)
Always use a sharp tool to ensure clean cuts. It’s a smart move to disinfect your saw blade before you start to prevent spreading any bacteria. Try to make smooth cuts at a slight angle so rainwater can slide right off the wound. While you can apply a wound sealer to large cuts, the tree’s own resin usually does a fantastic job of healing things up on its own!