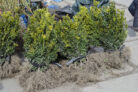
Boxwoods are known for being slow growers, especially when they’re living the container life. This means it takes a while for their roots to really fill out a pot, but you can’t just “set it and forget it” forever. Repotting is one of those essential chores you’ll need to tackle every few years to keep your greenery happy. Here’s the lowdown on how to do it right.
When and how often should you repot?
The best time to move your boxwood is when the roots have completely filled the current pot. Aim for early spring—around mid-April is perfect—just before the new growth starts to pop. Since boxwoods take their time growing, you’ll usually only need to do this every 2 to 3 years. Don’t wait much longer than that, though! If the roots get too cramped, you’ll notice the growth stalling out, and you might even see branches drying up because the roots can’t grab enough water anymore.
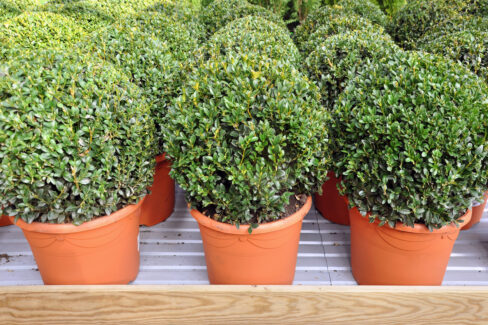
Choosing the right pot and soil
As long as you’ve got the space on your porch or patio, try to go up about 2 inches (5 cm) in pot size every time you move it. The most important thing? Drainage. Make sure your pot has large drainage holes so your plant doesn’t end up with “wet feet.” If your pot is already massive or your boxwood has reached its perfect size, you can just refresh the soil instead of sizing up. You can grab a specialized boxwood mix at the store, or whip up your own “garden cocktail” using:
- High-quality potting soil
- Compost
- Sand
You’ll also want some expanded clay pebbles, broken pottery shards, or gravel for a 2-inch drainage layer at the bottom, plus some landscape fleece to keep the soil from washing into the rocks.
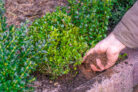
How to repot your boxwood
- Carefully remove the boxwood from its old home. If it’s being stubborn, give the sides of the pot a few gentle taps to loosen the root ball.
- Shake off the old, tired soil from the roots.
- Give the root system a good once-over.
- Use clean shears to snip off any damaged or rotting roots.
- If you’re putting the plant back into the same pot (or want to keep it from getting bigger), trim the roots back slightly. If you do this, make sure to prune the top of the plant a bit too so the roots can support the foliage.
- Fill a large bucket with water and soak the root ball until the bubbles stop rising. This ensures it’s fully hydrated.
- Place a pottery shard over the drainage hole and add your drainage material (clay pebbles or gravel).
- Lay the landscape fleece over the drainage layer so the soil doesn’t mix in.
- Fill the pot about halfway with soil and set your boxwood in the center.
- Fill in the gaps with more soil, but leave about an inch or two at the top as a “watering rim” so water doesn’t overflow.
- Give it a good drink and move it to its favorite spot.
Pro Tip:
Keep a close eye on the water during those first few weeks; you’ll need to water regularly while it settles in. You can actually skip the fertilizer for a while, as fresh potting soil is usually packed with enough nutrients to keep your boxwood fed for the start of the season!