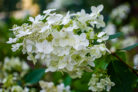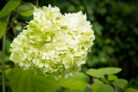
Sometimes, your panicle hydrangeas just need a change of scenery. Maybe they’ve outgrown their current spot, or perhaps that “perfect” corner isn’t as sunny as you thought. To make sure your shrub survives the move without a hitch, a little prep work goes a long way.
When to Transplant Your Panicle Hydrangea
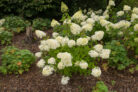
The sweet spot for moving these beauties is after they’ve finished blooming—usually from October until the first frost hits. Moving them in the fall gives the plant plenty of time to establish a solid root system before the spring wake-up call. When picking a new home, look for a spot with partial shade and loose, humus-rich soil that’s slightly acidic and low in lime.
Step-by-Step Transplanting
When you’re moving a panicle hydrangea, the goal is to keep as many of those delicate feeder roots intact as possible. Here’s a pro tip: you can actually encourage the plant to grow a denser root ball before the move! During the summer, dig a narrow trench around the plant and fill it with loose, nutrient-rich potting soil. This stimulates the growth of fine roots right where you’ll be digging later.
When it’s time for the big move, follow these steps:
- First, use a garden fork to gently loosen the soil around the hydrangea.
- Next, use a spade to dig out the root ball, going as deep as you can to keep it whole.
- Carefully lift the plant out of the ground. If you’re dealing with a massive, heavy shrub, don’t be afraid to use ropes or poles to help hoist it out.
- Clean up the roots by trimming away any that got broken or torn during the dig. You’ll also want to give the branches a good pruning. Cutting back the top growth helps balance things out so the smaller root system can easily support the plant. This is also a great time to thin out any crowded branches.
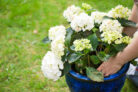
- At the new location, dig a hole that is at least one-third larger than the root ball itself.
- Mix the soil you dug out with some fresh potting soil and humus to give your hydrangea a nutritional boost.
- Set the plant in the hole, fill it back up with your soil mix, press down firmly to remove air pockets, and give it a thorough watering.
Since moving is stressful (for plants too!), your hydrangea will be a bit sensitive for a while. Give it some extra love during its first winter in the new spot by wrapping it in burlap, fleece, or straw mats. A thick layer of mulch around the base will also help protect those roots from a hard freeze.