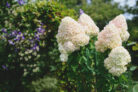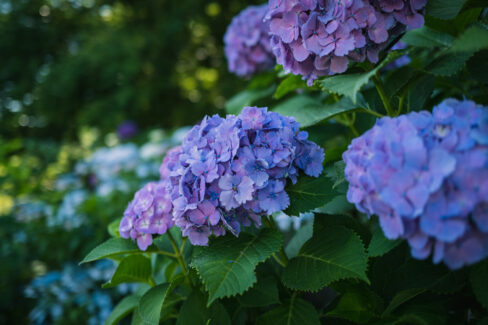
Once your hydrangeas have settled into a spot, they usually prefer to stay put. However, life happens—maybe you’re remodeling your yard or that “partial shade” spot turned into a sun-scorched patch. Whatever the reason, sometimes you just have to move them. Here is everything you need to know to transplant your hydrangeas successfully without stressing them out too much.
Pick the Perfect New Home
First things first: you want to choose a great new location for your hydrangea right out of the gate. This ensures the plant roots quickly and saves you from having to move it again in a couple of years!
Here’s what your hydrangea is looking for in a new neighborhood:
- Soil pH should ideally be between 4.5 and 6.5.
- The dirt needs to be well-draining but rich in nutrients.
- Most varieties love partial shade or dappled sunlight.
- Find a spot that’s sheltered from harsh, drying winds.
- Give them plenty of elbow room! Check the spacing requirements for your specific variety.
Not sure about your dirt? You can grab a simple pH test kit at any local garden center. If your soil isn’t quite right, don’t worry—you can fix it by mixing in some specialized hydrangea soil. Rhododendron or azalea potting mixes also work wonders since they love that same acidic environment.
Timing is Everything
If you want your hydrangea to thrive after the big move, timing is key. The absolute best time to transplant is in the fall. By then, the blooms have faded and the plant can put all its energy into establishing new roots before winter sets in.
If fall doesn’t work for you, early spring is your next best bet. Just make sure you get them in the ground before they start putting out new growth and after the threat of a hard frost has passed.
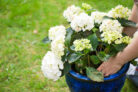
How to Move Your Hydrangea Like a Pro
When you’re ready to dig, try to get as much of the root ball as possible. Be gentle—you want to keep those roots intact! If you have a massive hydrangea on your hands, this is actually a great time to divide the plant and get two for the price of one. At the new spot, dig a hole that is about twice as wide as the root ball.
Step-by-Step Transplanting:
- For large plants, prune them back by about a third to make them easier to handle.
- Dig a circle around the base of the plant. A good rule of thumb is to match the diameter of the plant’s canopy.
- Carefully lift the plant out, trying to keep the root ball whole.
- Wrap the roots in burlap if you need to move it across the yard.
- Dig your new hole at the chosen site.
- Get the hydrangea in the ground the same day you dug it up—don’t let those roots dry out!
- Fill the hole with high-quality soil or substrate.
- Give it a very thorough watering.
Once it’s in its new home, backfill the hole with hydrangea, azalea, or rhododendron soil. Make sure the soil stays loose and well-draining, and be extra diligent about watering your hydrangea for the first few weeks. It takes a lot of moisture for those roots to get comfortable in their new home!