The variety of fruit trees out there is huge, so it’s worth taking a moment to think about what will actually thrive on your balcony, patio, or in your backyard. Some varieties are specifically bred for life in a container—these are your best bet! I always recommend chatting with the pros at your local nursery or garden center to find the perfect match for your space.
Caring for Potted Fruit Trees
I’ll be honest with you: growing espalier fruit in a pot isn’t exactly a “set it and forget it” project. It takes a bit of elbow grease. You’ll need to stay on top of watering and fertilizing, and regular pruning is essential to train the tree into that classic shape. If you let the maintenance slide, it’s pretty tough to get that structured look back. Remember to give your trees a specialized fruit fertilizer in the spring, and don’t forget to prep for frost protection once winter rolls around!
How to Plant an Espalier Tree in a Container
Pots aren’t just for flowers and shrubs anymore! Fruit trees make a gorgeous—and delicious—addition to any patio or balcony. Placing them against a wall often provides a warm, sheltered microclimate, which means you can even grow varieties that usually prefer warmer regions. To make things easier, I suggest picking a planter that comes with a built-in trellis. There are tons of styles available, so check out your local garden shop to see what fits your vibe.
Step-by-Step Planting Guide
- Start by giving the root ball a good soak in a bucket of water.
- Choose a large container (at least 20 inches in diameter) that has drainage holes at the bottom.
- Create a drainage layer using broken terracotta shards, pebbles, or even pieces of Styrofoam to prevent “soggy feet” (root rot).
- Fill the pot with a thick layer of high-quality potting soil; a clay-based substrate works great here.
- Mix in some slow-release fertilizer according to the package instructions.
- Keep that root ball soaking until the air bubbles stop rising. Then, take it out and let it drip dry for a moment.
- Gently loosen the roots with your hands and place the tree in the pot, making sure the trunk is standing up straight.
- Ensure the root ball sits at the same depth it was in its original nursery pot. Fill the gaps with your fertilizer-enriched soil.
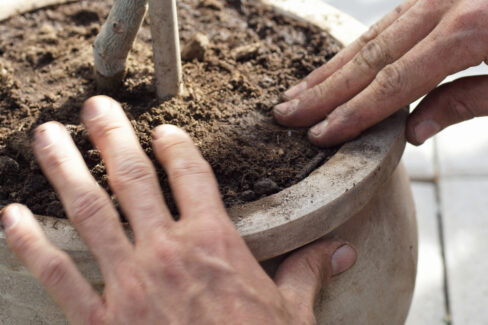
- Firmly press the soil down with your fingers to get rid of any large air pockets.