If you’re looking to harvest a bumper crop of peas this year, it takes more than just picking a good variety and keeping up with the weeding. The real secret sauce is your fertilizer game. Getting the right nutrients into the soil at the right time doesn’t just boost your yield—it actually keeps your plants healthier and more resilient.
Getting Off to a Strong Start
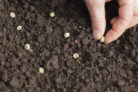
Even though peas are generally considered “light feeders,” they definitely won’t say no to nutrient-rich soil. Once pea planting season kicks off in April, you’ll want to make sure your garden beds are prepped and ready.
Start by loosening the soil deeply. While you’re at it, work in some organic, slow-release fertilizer. This gives your peas the “fuel” they need for that initial growth spurt and helps them develop lush, green foliage.
Great slow-release options include:
- Finished compost
- Well-aged manure
- Horn meal or bone meal
The Secret Ingredient for Blooms: Potassium
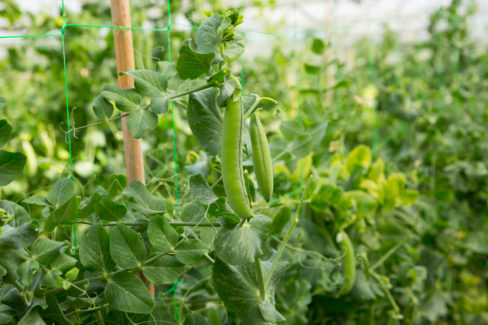
As soon as you see those first blossoms peeking out, it’s time to give your peas a little boost of potassium (potash). Potassium is a game-changer because it encourages more flowers and helps the plants develop firm, sturdy pods. Plus, stronger pods mean your crop is much less likely to be bothered by pests and diseases.
Just remember: a little goes a long way. Usually, one moderate application right when the flowering starts is all they need.
Boost Your Plants with Nettle Tea
Toward the end of the season, you might notice your plants slowing down or becoming more susceptible to fungal issues. This can be a real bummer because fungi can make the peas taste and smell a bit “off.” To prevent this, I highly recommend using stinging nettle tea (liquid manure). It’s a time-tested organic tonic that strengthens the plants and adds a quick hit of nutrients that the roots can absorb instantly.
How to make your own nettle tea:
- Roughly chop up some stinging nettle leaves.
- Fill a bucket about 2/3 full with the chopped greens.
- Top it off with water.
- Cover the bucket.
- Give it a good stir every 2 to 3 days.
The tea is ready once the plant material has mostly broken down. Fair warning: this stuff can get pretty stinky during the fermentation process! If the smell is too much, just sprinkle a little rock dust on top to help neutralize the odor.
Once it’s ready, dilute the mixture (1 part tea to 10 parts water) and give your plants a drink once a week. If you spot aphids moving in, you can even use this diluted tea as a foliar spray. The nutrients in the tea help build stronger cell walls, making it much harder for pests to take a bite out of your hard work!