If you’re dreaming of a long, lush boxwood hedge, you probably already know that one single shrub won’t get the job done. You’re going to need a lot of plants, and if you buy them all from a nursery, that bill is going to add up fast! But here’s a pro tip: if you have access to a healthy “mother” plant and a little bit of patience, you can propagate your own boxwoods for next to nothing.
Timing and Picking the Right Cuttings
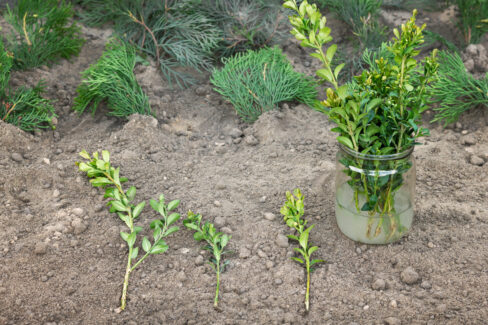
Technically, you can propagate evergreen boxwoods year-round (especially if you do it indoors), but the sweet spot is definitely between June and August. Since boxwoods are notoriously slow growers, I like to use larger cuttings—anywhere from 8 to 12 inches long—to give them a head start. However, even tiny sprigs just a few inches long can take root. For the best results, try to get “heel cuttings” (pulling the shoot off so a bit of the old bark stays attached), as these tend to root much more reliably.
- Pick a large, strong branch with several offshoots.
- Make sure the side shoots are “mature” (woody); if they’re too soft and green, they’ll just rot.
- Ideally, shoots should be at least two years old and about 4 inches long.
- Cut the main branch, then pull the side shoots off downward.
- Keep that little “tail” of bark at the bottom (just trim it slightly with shears if it’s too long).
- Strip the leaves off the bottom third of the stem.
- Dip the ends in some rooting hormone to give them a boost.
- Snip off the very top tip of the cutting by about a third to encourage bushier growth.
Quick Note:
Yes, you *can* grow boxwood from seed, but honestly? It’s a total headache and way too finicky for most home gardeners. Stick with cuttings!
Planting Cuttings Directly in the Garden
If you’re working with larger cuttings during that peak summer window, you can actually stick them right into a garden bed. Just make sure the soil is nice and loose and mix in some compost first.
- Bury the bottom third of the cutting firmly into the dirt.
- Make sure no leaves are touching the soil, or you’re asking for fungal infections.
- Give them a good soak and keep the soil consistently moist.
- Watch out: Don’t let the soil get swampy, or the stems will rot!
- If your spot is windy or super sunny, protect them from the elements.
- In the fall, cover them with some evergreen boughs or brush to insulate them from frost.
- You can transplant them to their permanent home the following spring.
Using a Mini-Greenhouse for Smaller Cuttings
For smaller cuttings—or if you’re trying this outside of the summer months—it’s better to start them indoors. A mini-greenhouse with a clear lid is perfect for this. Just remember to vent it daily so fresh air can circulate. Use a low-nutrient seed-starting mix and keep it damp but not soaked. A bright windowsill is the perfect home for them, or a semi-shaded spot outside on warm days. Just make sure these little guys spend their first winter safely indoors. You can plant your rooted success stories outside the following spring.
Pro Tip:
Don’t have a mini-greenhouse? No worries! Just use a regular pot and pop a clear plastic bag over the top. It creates that same warm, humid “sauna” effect that helps the roots pop.
