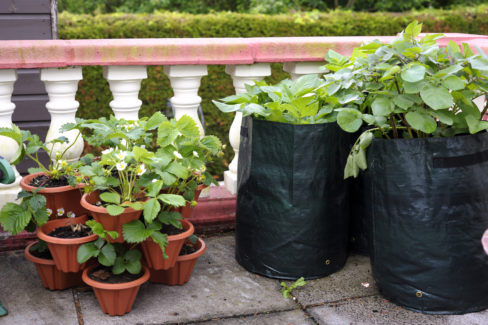
Did you know there are about 4,000 potato varieties worldwide? While we don’t see all of them at the local grocery store, there are plenty of fantastic options perfect for home growing. If you think you need a huge backyard to grow your own spuds, think again! Many varieties do amazing in containers right on your balcony. Let’s dive into how you can get started.
The Perfect Balcony Spot
A balcony can actually be a little paradise for plants. Since potatoes originally hail from the warm climates of South and Central America, they love the cozy, sheltered vibe a balcony provides. For the best results, find a sunny spot where they can soak up the rays. They’ll still do okay in partial shade, but you definitely want to avoid deep shade if you’re looking for a good harvest.
Choosing Your Varieties
- Adretta: Originally bred in 1975, this classic features yellow skin and flesh. It’s a superstar in the kitchen, perfect for fluffy mashed potatoes, hearty stews, or homemade dumplings.
- La Ratte: This heirloom variety from France is a total gourmet favorite. It has a unique fingerling shape and a delicious, nutty flavor that makes it a true delicacy.
- Heiderot: If you want some color on your plate, this is the one! It’s a striking red all the way through. With its buttery flavor and vibrant hue, it’s the perfect choice for a show-stopping potato salad.
Getting Them in the Ground (or Pot!)
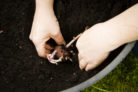
One of the perks of balcony gardening is that the season starts a little earlier than out in the open fields. You can get your tubers in the soil as early as March. To give them a head start, try “chitting” (pre-sprouting) them indoors. Just pop your tubers in a box at around 60°F (15°C) in early March to let those sprouts develop.
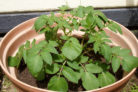
- Grab a pot or planter that’s at least 12 inches (30 cm) deep.
- Fill it with high-quality potting mix or compost.
- Press a hole about 4 inches (10 cm) deep and place the tuber inside with the sprouts pointing up.
- Place the pot on a saucer in a sunny spot and give it a good initial watering.
Care and Maintenance
To grow big and healthy, potatoes need a steady supply of water and nutrients. Most store-bought potting soils come pre-fertilized, so check the bag for details. If you want to boost your soil, you can mix in some well-rotted manure or horn meal to keep your plants well-fed throughout the season.
When it comes to watering , consistency is key. You want the soil to stay lightly moist, but never soggy. Rainwater is the gold standard, but tap water works just fine—try to let it sit out for a bit to reach air temperature first. It’s best to water in the morning so the leaves have time to dry off during the day, which helps prevent diseases like blight.
Pro tip: If you’re also growing tomatoes on your balcony, keep them as far away from your potatoes as possible. They’re cousins and can easily pass late blight back and forth!
One last thing: Harvesting from a pot is incredibly easy. No heavy digging required—just tip the container over and “hunt” for your homegrown treasures in the soil!