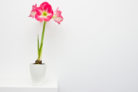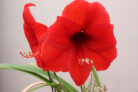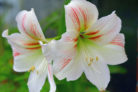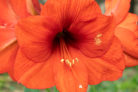
During those gloomy winter months, the elegant Amaryllis is a total game-changer, bringing a splash of exotic color and those massive, show-stopping blooms right into our living rooms. But to really get the best out of this subtropical beauty, there are a few tricks you need to know. Here’s the lowdown on how to plant your Amaryllis like a pro and—more importantly—how to make sure that bulb blooms again next year.
How to Plant and Care for Your Amaryllis
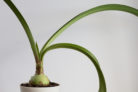
The Amaryllis (or *Hippeastrum*, if you want to get fancy) is a stunning, hardy plant, but it can be a little picky if its needs aren’t met. Here’s how to keep yours happy.
Find the Perfect Spot
To produce those gorgeous flowers, your Amaryllis needs a bright, warm home. Sunlight is the secret ingredient that triggers those petals to develop. However, if the sun is beating down really intensely, a spot with filtered light or partial shade is actually a safer bet to prevent scorching.
Use the Right Soil
These plants originally hail from the Peruvian Andes, where the soil is well-draining but packed with nutrients. I’ve found that a mix of standard potting soil and cactus mix works wonders. If you want to go the extra mile, toss in some perlite for aeration. Coconut coir is another great alternative. Just make sure the soil isn’t too heavy on the humus, as that can lead to rot.
Water with Care
When it comes to watering, less is often more. You never want your Amaryllis sitting in “wet feet.” Soggy soil is a death sentence because it invites rot and fungus. And here’s a pro tip: during its dormant phase, don’t water it at all, or you might accidentally skip next year’s bloom!
When you do water, use lukewarm water and pour it into the saucer rather than over the bulb. Wait until the top of the soil feels dry before giving it more. You don’t want it bone-dry, but definitely not soaked. Always dump out any excess water left in the saucer after a few minutes.
Don’t Forget the Fertilizer
Once those first buds start to peek out, it’s time to start fertilizing every two weeks. Use a fertilizer specifically designed for flowering bulbs. Once the flowers have faded, stop the feeding. During its “nap time” (regeneration phase) starting in September, your Amaryllis doesn’t need any extra nutrients.
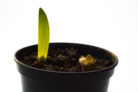
Planting Step-by-Step
If you want those iconic Christmas blooms, you’ll usually want to get your bulb in the ground (or pot!) by November.
Here’s how to do it:
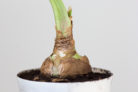
- Pick out a sturdy pot.
- Prep your soil mix.
- Add a drainage layer (like pebbles) at the bottom of the pot.
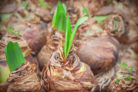
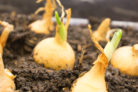
- Set the bulb in with the pointy end facing up.
- Fill in the soil so that the top half of the bulb is still sticking out.
- Give it a good drink from the bottom.
- Empty the saucer after about 5 minutes to prevent root rot.
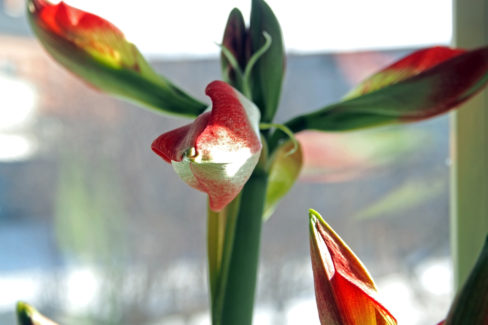
- Move it to a bright, warm spot and watch the magic happen.
Extra Pro-Tips
Those lush flowers can get surprisingly heavy! To keep your plant from tipping over, use a heavy pot—terracotta or clay works perfectly.
Also, when you repot your bulb after its rest period, try mixing a little bulb fertilizer directly into the soil. It gives the plant a nice energy boost to kickstart the next round of flowering!