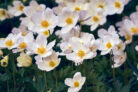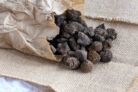
At first glance, those little brown, shriveled-up tubers don’t look like much. But don’t let appearances fool you! With a little TLC and the right timing, these tiny “ugly ducklings” transform into some of the most stunning blooms in the garden. Here is the secret recipe for getting your anemones off to a perfect start.
Prepping and Starting Spring-Blooming Tubers
The sweet spot for planting windflowers (as anemones are often called) is between late March and mid-April, specifically on a day when the frost has let up. If you’ve been overwintering your bulbs in the cellar, pull them out a day before planting to make sure they’re still healthy. If you’re buying new ones, try to get them right before you plan to plant so they don’t dry out too much in the packaging.
Pro Tip: Give your tubers a “spa day” before they go into the ground. Soak them in lukewarm water for 24 hours to help them plump up and wake up.
If you’re feeling a bit more ambitious, you can start your spring anemones indoors in pots on a sunny windowsill as early as February. Once the ground has warmed up and the risk of frost has passed, you can move them outside. Just remember to “harden them off” by gradually introducing them to the outdoor air for a few days before transplanting.
Note:
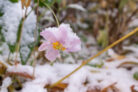
While you can plant truly hardy varieties in the fall, a harsh winter can be tough on them. If you go the autumn route, be sure to tuck them in with a thick mulch of leaves or straw for protection.
Location and Soil
Anemones aren’t huge fans of the intense, midday sun. They really thrive in dappled shade. Planting them under deciduous trees or shrubs is perfect because they get the light they need before the canopy fills in. Avoid planting them directly under evergreens, though, as the soil there is usually too acidic for their liking. They prefer sandy, humus-rich soil that drains well—soggy “wet feet” are a big no-no. If your soil is a bit heavy, mix in some compost and a pinch of lime.
Step-by-Step Planting Guide
Once your tubers have finished their 24-hour soak, get them into the ground right away:
- Prep the holes: Dig them about twice as wide and twice as deep as the tuber itself.
- Spacing: Give them about 4 inches (10 cm) of breathing room between each plant.
- Planting: Place the tuber in the hole, cover with soil, and press down firmly to remove air pockets.
- Watering: Give them a light drink, but don’t overdo it.
Anemones also do great in containers! Just make sure you use a loose, nutrient-rich potting mix.
Planting Fall-Blooming Anemones
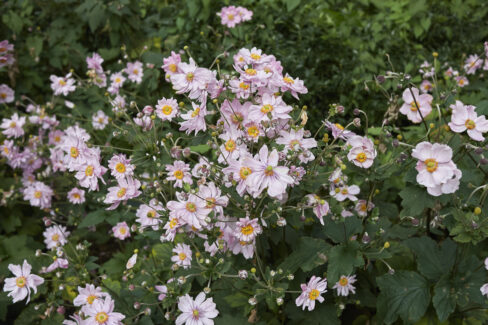
Then we have the late bloomers—the Japanese Anemones. These are perennials, meaning once you plant them, they’ll grace your garden for years to come. They are generally hardy and low-maintenance. Unlike their spring cousins, these beauties love a sunnier spot to ensure a massive flower show. They also prefer soil that is a bit more loamy, but you’ll need to make sure it stays consistently moist, especially in the sun.
Here’s the drill for fall anemones:
- Timing: Plant between late March and mid-May.
- Dividing: This is also the perfect time to divide large, established clumps.
- Spacing: Give them plenty of room—about 3 feet (80–100 cm) apart.
- The Hole: Dig deep! They have long taproots that don’t like to be cramped or damaged.
- Depth: Set the plant so the crown sits just barely above the soil surface.
- Commitment: Choose your spot wisely; because of that taproot, they hate being moved once established.
- Pots: You can grow them in containers, but make sure the pot is extra deep.
Quick Tip:
Even though they are hardy, give your fall anemones some extra frost protection for the first two or three winters. They need a little time to build up their full strength and resilience!