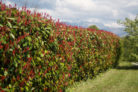
If you’ve already got a healthy Photinia (Red Robin) brightening up your garden but find yourself wanting a few more, you’re in luck! You don’t need to run back to the nursery to expand your collection. With a little bit of know-how and a healthy dose of patience, you can propagate your own.
Is it easy to propagate Photinia?
The short answer? Yes! Photinia is actually pretty easy to propagate, and you’ve got a few different ways to go about it. If you go the vegetative route—using cuttings or “layering”—you’ll end up with new plants that are genetic clones of the parent. If you’re feeling adventurous and decide to grow them from seed, you’ll get plants with a bit more genetic variety.
Picking the perfect cuttings
Technically, you can take cuttings from your Photinia almost any time of year. However, the “sweet spot” is during the summer, which works out perfectly if you’re already doing your annual pruning. Look for healthy, semi-hardwood tips about 12 inches long. You want stems that have about three pairs of medium-sized leaves near the top.
What do I do with the cuttings?
To give your cutting the best chance at survival, we need to minimize moisture loss. Strip off all the leaves except for the top two pairs. Then, tuck the stem about an inch or two deep into a good seed-starting mix (potting soil or a blend of sand and peat works great). Give it a gentle drink, but be careful—these guys hate sitting in soggy soil.
To create a little mini-greenhouse, pop a clear plastic bag or film over the pot. This keeps the humidity up so the cutting doesn’t dry out. Just keep an eye on the soil; you want it consistently moist but not drenched. If it starts looking dry, give your future Photinia a little water.
Growing new plants via “Layering”
If you have a flexible, healthy branch near the ground, “layering” is a fantastic, low-effort method. Pick a spot on the branch about 12 to 15 inches from the tip. Dig a small hole in the ground right where that section of the branch can touch the earth, and toss in a little compost as fertilizer.
Now, take a clean, sharp knife and gently nick the bark on the underside of the branch (the part that will be touching the soil). Bend the branch down into the hole, cover it with dirt, and weigh it down with a stone. Just make sure the very tip of the branch is still pointing up toward the sky!
Caring for your “baby” plants
Young Photinias need a bit more TLC than the established ones in your yard. Those tender new roots are pretty sensitive—they can’t handle standing water, but they definitely need enough moisture to keep growing. Since they aren’t frost-hardy in their first year, I highly recommend planting them in containers so you can move them to a protected spot when it gets cold.
The Quick Highlights:
- Propagation methods: Seeds, layering, or cuttings.
- Best time for seeds: Right after they ripen.
- Best time for layering: Spring.
- Best time for cuttings: Summer.
- Pro tip: Young plants are delicate and not yet winter-hardy.
Quick Tip: If you’re trying to grow them from seed, they actually germinate best in a cool, dark spot!