You know how English Ivy in the garden seems to have a mind of its own, spreading everywhere with or without our help? Well, your indoor ivy has that same “can-do” spirit! The only catch is that since it’s living in a pot, it’s a bit limited in its travels and needs a little assist from you to start a new family. If you’re looking to add a few more green friends to your collection, you’re in luck—it’s incredibly easy.
Two Simple Ways to Propagate
You can propagate your indoor ivy using two main methods:
- Using cuttings
- Using “layering” (runners)
Both methods are pretty much foolproof, so just pick whichever one sounds like more fun to you!
Propagating Indoor Ivy from Cuttings
If you’ve got a lush, healthy ivy plant, you’ve already got plenty of material to work with. Or, maybe you have a friend who’s willing to share a few snips! While you can technically propagate ivy indoors year-round, I’d recommend avoiding the dark stretch between November and February. The lack of natural light during those months makes it a bit harder for the little guys to get established.
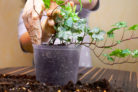
To start, cut a tip from a vine about 6 inches long. Strip the leaves off the bottom end and give the stem a tiny little scratch or nick to encourage growth. If you’re looking to grow several new plants at once, you can take a semi-woody vine and cut it into several 4-inch sections. Just a pro-tip: make sure you keep track of which end is the “bottom” so you don’t accidentally plant them upside down!
You can pop these cuttings into a glass of water until they grow roots about an inch long, then move them to small pots. Alternatively, you can stick them directly into potting soil right after cutting.
Propagating Ivy via Layering
For this method, you’ll need an ivy plant with long, flexible vines. You’ll also need some small pots filled with seed-starting mix and something to hold the vines down, like landscape staples, bent paperclips, or even small stones. Here’s how you do it:
- Fill your small pots with seed-starting soil.
- Place them right next to your “mother plant.”
- Take a long vine and bend it down so it touches the soil in the new pot. Try to pick a section that doesn’t have aerial roots yet.
- Remove the leaves at the point where the vine touches the soil and give that spot a light nick with a knife.
- Pin that leafless section down into the soil using your staple or stone and cover it with a little dirt. Make sure the very tip of the vine is still peeking out of the soil.
- If you have a really long vine, you can actually “snake” it through several pots, pinning it down every 15 inches or so.
- Keep the soil consistently moist, but be careful not to overwater.
- Once you see new growth popping up, you’ll know it has its own roots! At that point, you can snip the new plant away from the mother plant.
Quick Tip:
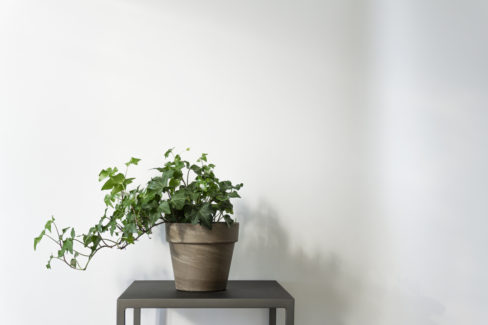
Try putting some ivy in your bedroom for a better night’s sleep. These plants are total rockstars at filtering toxins out of the air—specifically formaldehyde, which is definitely something you don’t want to be breathing in while you snooze!