The Yucca isn’t just a tough-as-nails, low-maintenance houseplant; it’s also incredibly easy to propagate. However, since you’ll be cutting pieces off your mother plant, you’ll want to keep an eye on the plant’s overall stability during the process.
Cuttings
The simplest way to grow new Yuccas is through cuttings. Because these cuttings are often quite large compared to other plants, people sometimes call them “pups” or “offshoots.” While that’s not technically accurate in botanical terms, we all know what you mean!
What’s great about Yucca propagation is that you can even grow new plants from sections of the trunk that don’t have any leaves yet. In the gardening world, we distinguish between:
- Cane cuttings (no leaves)
- Head cuttings (the leafy top)
Don’t worry too much about the terminology, though—the actual process for rooting them is pretty much the same.
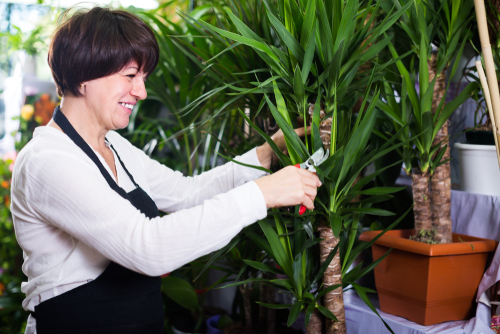
Taking the Cuttings
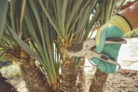
Just like with most plants, you’ll start by taking a clean cut from the mother plant. The cool thing about Yuccas is that you can essentially chop the plant into several pieces, and every single one can become a new plant. When you divide a Yucca, you end up with:
- The leafy head cutting
- Several cane cuttings
- The original rooted base
You don’t have to be super precise with the size, but aim for cane cuttings between 8 and 12 inches long. Pro tip: Mark the “top” and “bottom” of your cane cuttings immediately! They need to be planted in the same direction they were growing, or they won’t take root.
For the leafy head cuttings, make sure the bottom leaves aren’t touching the soil once planted, as this can lead to those dreaded brown leaf tips. As for the original rooted base? Even if you leave just 4 inches of trunk above the soil, it will sprout new growth.
Planting Your Cuttings
If you’re dividing your Yucca because of a soft or rotting trunk, play it safe and give each cutting its own separate pot. This prevents any lingering rot or bacteria from spreading. If you’re just thinning out a healthy plant to give it a fresh start, feel free to group a few cuttings in one large pot for a fuller look.
Once you’ve got your pots ready, here’s the game plan:
- Add a drainage layer of gravel or broken terracotta pieces at the bottom.
- Fill the pot with loose, well-draining potting soil.
- Insert the cutting about halfway into the substrate (dig a small hole first if needed).
- Double-check that your cane cuttings are right-side up!
- Fill in the rest of the soil.
- Press the soil down gently to stabilize the plant.
- Give it a good watering.
Finally, you’ll want to seal the “wound” on the top end of any leafless cane cuttings to prevent drying out. Place your new plants in a bright, warm spot away from direct sunlight. In a few weeks, they should develop roots and start showing off new growth.
Repotting the Rooted Base
Since a radical pruning is a bit of a shock to the original plant (the rooted base), it’s a good idea to give it some TLC by repotting it. You don’t necessarily need a bigger pot, but the plant will definitely appreciate some fresh, nutrient-rich soil.
Once you’ve repotted the base, seal the cut surface at the top. Just like the cuttings, keep it in a bright, warm spot out of harsh, direct sun while it recovers.