Daylilies are widely known as the ultimate “low-maintenance” guests in any garden. They’re gorgeous, hardy, and usually pretty happy just doing their thing. However, if your daylilies aren’t showing off like they used to, there might be a few things going on under the surface. Often, a simple change of scenery—aka transplanting—is exactly what they need to get their groove back.
Why Move Them?
Daylilies aren’t exactly divas; they don’t ask for much and can stay happy in the same spot for years. But, you might want to grab your shovel if:
- Your daylily has stopped blooming (the dreaded “all green, no sheen” look).
- You’ve got a new plant in mind for that specific garden real estate.
- The current spot just isn’t working out (too much shade, poor drainage, etc.).
- They’ve grown so much they’re starting to feel a bit claustrophobic.
Where Should They Go?
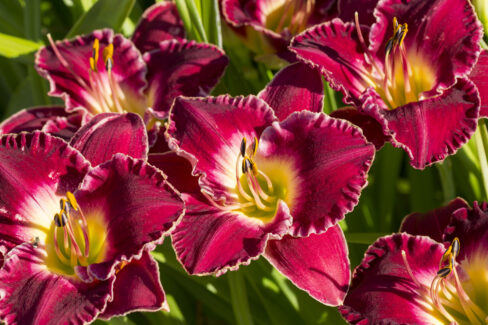
Finding a new home for a daylily is a breeze. They generally love a spot with full sun or partial shade. Here’s a pro tip: if your daylily has light-colored petals, give it all the sun it can handle. If you have a variety with deep, dark blooms, a bit of afternoon shade is actually better—it keeps those rich colors from fading or “bleaching” in the intense midday heat.
When Is the Best Time?
You’ve got two main windows for a successful move. The best times are in the spring right after the first shoots pop up, or in the fall once the blooming season is over. That said, daylilies are tough as nails. If you absolutely have to move them in the middle of summer, they’ll likely survive, but for the best results, try to plan for a spring or fall relocation.
How to Do It
First things first: dig up the plant. You’ll want to be gentle here to keep the root system as intact as possible. Once it’s out, shake off the excess dirt or give the roots a quick spray with the garden hose so you can see what you’re working with. Now, grab a sharp knife and slice the root clump vertically (top to bottom) into fist-sized sections. This is also the perfect way to divide and propagate your daylilies so you have even more to plant elsewhere!
At the new site, dig a hole and create a little mound of soil at the bottom. Set the roots right on top of that mound and fill the hole back in with dirt. Press the soil down firmly to get rid of air pockets and give it a good, deep soak. Adding a layer of mulch is a great idea to keep moisture in. Finally, trim the leaves back to about 6 inches (15 cm). Make sure to keep the watering can handy for the next two weeks while they settle into their new home.