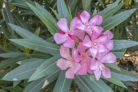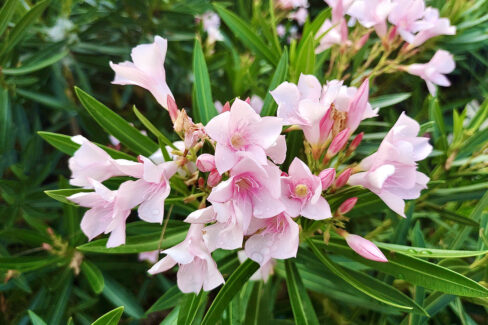
You can propagate oleander in a few different ways to grow your collection. In this quick guide, I’ll walk you through the most common methods and share some pro tips to help your new plants thrive.
Different Ways to Propagate Oleander
If you want to grow more oleanders, you have three main options:
- Propagating from cuttings,
- Propagating by division,
- and growing from seed.
Propagating Oleander from Cuttings
The most popular and successful way to get a new plant is by taking cuttings.
A Pro Tip
The best time to grab your cuttings is when you’re already pruning your oleander. Instead of tossing those trimmings in the green bin, pick out the best pieces and turn them into brand-new plants!
How to Take Cuttings
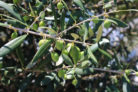
When selecting your cuttings, look for young shoots that haven’t become too woody yet. These “greenwood” cuttings tend to root much faster. That said, older branches can work too if that’s all you have.
Aim for cuttings about 6 to 8 inches long. Snip them off just below a leaf node. To help the plant soak up water better, make your cut at a slight angle. Strip off the bottom leaves, and if the top leaves are huge, you can actually snip them in half to reduce moisture loss.
Potting Your Cuttings
Stick your cuttings into a pot filled with a high-quality seed-starting mix. To keep things nice and humid, place a clear plastic bag over the pot. Just remember to peek inside and vent it occasionally so things don’t get moldy!
The Water Method
Alternatively, you can just pop your cuttings into a glass of lukewarm water. If you go this route, make sure to swap out the water every day to keep it fresh.
Waiting for Roots
Place your pot or water glass in a warm, bright spot—an indoor windowsill is perfect. You should start seeing little roots after about four weeks. Once the root system looks sturdy, your baby oleander is ready for its very own pot.
Propagating Oleander by Division
Another super straightforward method is division. The next time you’re repotting your oleander, you can simply divide the root ball. Just make sure each section has at least one healthy main shoot attached.
Plant the new sections into their own pots right away. The best time for this is in the spring, ideally before the blooming season starts. This gives the plant plenty of energy to focus on new growth and flowers.
Growing Oleander from Seed
If you’re a patient gardener, you can try growing oleander from seeds. Keep in mind that seeds won’t produce an exact clone of the parent plant. This is actually how new varieties are bred! It’s a bit of a surprise what color or shape the flowers will be, but you’ll have to wait a while to find out—young oleanders usually don’t bloom until their third year.
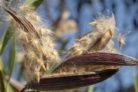
The Seeds
Oleander seeds grow inside seed pods. Not every plant will produce them, though. If the flowers were successfully pollinated, you’ll see small fruits (the pods) develop toward autumn.
Producing these pods takes a lot of energy. If you want your plant to focus on flowers, it’s best to deadhead them. But if you want seeds, leave the pods on the plant to ripen in a warm, sunny spot.
Sowing the Seeds
Late winter or early spring is the best time to start your seeds.
- Soak the seeds in a bowl of lukewarm water for a few hours or overnight to soften them up.
- Place them in a seed tray with starting soil or coconut coir and cover them lightly with a thin layer of dirt.
- Keep the tray in a warm, bright place (like a windowsill or a mini greenhouse) and make sure the soil stays consistently moist.
Watching Them Grow
It can take a few weeks for the seeds to sprout. Once the little seedlings have developed a few pairs of leaves, you can carefully transplant them into their own individual pots.
A Word of Caution: Toxicity
No matter which method you choose, always remember that oleander is toxic. Wear gloves and protect your skin while working with it, as even a little contact with the sap can cause skin irritation. Stay safe while you garden!