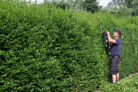
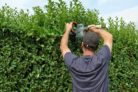
Just like its cousins in the privet family, the Atrovirens privet is a real speed demon when it comes to growth. It gets thick and lush fast, which is great for privacy, but it also means you’ve got to stay on top of your pruning game. Regular trimming isn’t just about keeping it looking sharp; it’s essential for the health of the plant.
The Different Ways to Prune Your Atrovirens Privet
To keep your Atrovirens looking its best, you’ll want to prune it several times throughout the year. Here’s a quick breakdown of the different types of cuts:
- The initial pruning right after planting.
- Structural pruning (2-3 times a year) to build a strong frame.
- Shaping (2-3 times a year) to keep those clean lines.
- Rejuvenation pruning for those older, “tired” privets.
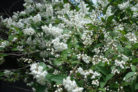
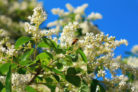
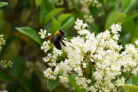
- A light annual maintenance trim if you’re keeping your privet as a pollinator-friendly bee buffet.
Why We Prune
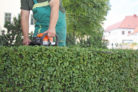
There are a few different reasons to grab the shears. Most often, it’s simply because privet grows so fast that it’ll lose its shape in a heartbeat if you don’t clip back those rogue shoots.
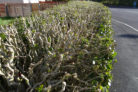
For young plants, don’t be afraid to be a little aggressive right after planting. A heavy initial cut encourages the plant to branch out at the base, leading to a much denser, “peek-proof” hedge later on. And if you have an old, leggy hedge? A hard rejuvenation cut can breathe new life into it, as these plants are incredibly resilient and will sprout fresh growth even from old wood.
The Best Shape for Your Atrovirens Privet
Privet is a total sun-seeker. If the bottom of the plant doesn’t get enough light, it’ll start losing leaves and look thin. To prevent this, I always recommend a “tapered” or trapezoid shape—where the bottom is slightly wider than the top. This ensures the lower branches get their fair share of Vitamin D. Avoid perfectly square shapes, as they tend to shade out the base of the hedge.
Pro Tips for a Perfect Cut
If you want your privet hedge to look like it was done by a pro, use a “cheat code”: stretch a string line between two wooden stakes to act as a level guide. If you’re feeling creative and want to try topiary or unique shapes, wire templates or stencils are your best friend. You can even DIY these out of chicken wire with a little patience!
Keep Local Wildlife in Mind
Before you start hacking away, always check your local ordinances regarding bird nesting seasons. In many areas, heavy pruning is restricted during the spring and summer months to protect nesting birds. You can usually do light maintenance trims year-round, but always do a quick “nest check” before you start to make sure you aren’t disturbing any feathered neighbors!