Most of us are used to seeing orchids in pots filled with that chunky, specialized bark mix. And if you want to keep those exotic beauties happy, regular repotting is a must! Once you see too many aerial roots wandering over the edge of the pot, it’s time to give your orchid a new home. Here’s my go-to guide on how to do it right.
Repotting means stress for your orchid
Even though repotting is a key part of orchid care, let’s be real: it’s a bit stressful for the plant. To keep the drama to a minimum, try to time your repotting for when the orchid isn’t blooming. The best window is either right after the flowering period ends or just as the plant wakes up from its winter rest.
When is it time to repot?
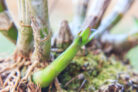
Orchids put out new aerial roots and shoots every year, but that doesn’t mean they need a new pot annually. You’ll know it’s time when a crowd of aerial roots starts escaping over the rim or—even worse—poking out through the drainage holes at the bottom.
Over time, orchid substrate also breaks down and loses its ability to hold nutrients and air. Fresh mix gives your orchid a much-needed boost, providing a clean environment and plenty of “breathing room” for the roots.
What you’ll need
Before you get your hands dirty, gather these supplies:
- A new nursery pot in the right size,
- Specialized orchid mix, plus some expanded clay pebbles or lava rock for drainage,
- Sharp, sterilized tools (like a knife or garden shears),
- A bit of cinnamon or charcoal powder,
- A spray bottle with lukewarm, filtered water,
- And an old sheet or tarp to catch the mess.
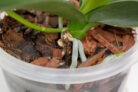
Choosing the right substrate
Orchids are picky—never use standard potting soil! They need a specialized orchid substrate. You can buy a pre-mixed bag or channel your inner scientist and mix your own using:
- Different sizes of pine or fir bark for a loose, airy texture,
- Organic extras like sphagnum moss or coconut fiber to help with nutrients,
- Inorganic bits like lava rock, perlite, or pumice to help manage moisture.
Picking the right pot
Believe it or not, you don’t always need a bigger pot. Since you’ll likely be trimming away old, dead roots, the orchid might fit perfectly back into a similar-sized container. Usually, it’s only the young, fast-growing orchids that need a size upgrade. Always choose the pot size based on the actual volume of the root ball, not the leaves!
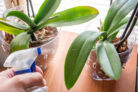
How to unpot your orchid
Pro tip: soak the orchid (pot and all) in a water bath before you start. This makes the roots flexible and much less likely to snap. Then, gently lift the orchid out and shake off the old bark. If any roots are stuck to the side of the pot, use a sharp knife to carefully tease them away.
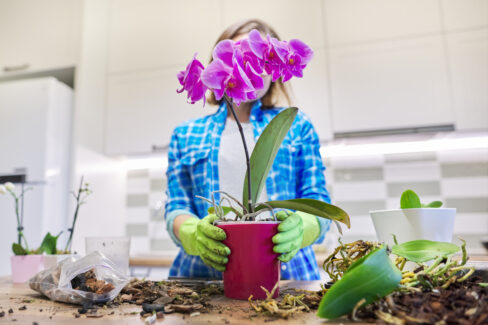
Trimming the roots
Repotting is the perfect time for a “root manicure.” Use your sterilized shears to snip off any mushy, brown, or shriveled roots. Be careful to leave the firm, green, or white healthy roots alone! To prevent infection, dab a little cinnamon or charcoal powder on the fresh cuts.
Potting your orchid like a pro
Ready to settle your plant in? Just follow these steps:
- Place a layer of clay pebbles or lava rock at the bottom of the pot for drainage.
- Add a thin layer of your orchid mix on top of that.
- Set the orchid in the pot. Use a gentle twisting motion to help the roots settle in comfortably. The “neck” of the orchid should sit right around the level of the pot’s rim.
- Fill the gaps with more mix. Give the pot a gentle shake or tap it on the table to make sure the substrate settles into all those nooks and crannies.
Aftercare tips
Once the orchid is settled, dunk the whole pot in lukewarm water for a few minutes so the new bark can soak up some moisture. Moving forward, mist the aerial roots regularly to keep the humidity levels high.
Don’t worry about fertilizing right away. Fresh substrate usually has enough nutrients to last for a few weeks. Wait about six to eight weeks before you start your regular feeding routine again.
Emergency repotting for overwatering
If you realize your orchid is sitting in soggy, stagnant water, don’t wait—repot it immediately! Root rot moves fast, and the stress of an emergency repotting is nothing compared to the damage caused by “wet feet.” The sooner you swap out that soggy mess for fresh bark, the better your plant’s chances of recovery.
Supermarket orchids need a quick change
If you just picked up a beautiful orchid from the grocery store, it’s usually a good idea to repot it pretty soon. They often come in pots that are way too small or packed in low-quality moss that holds too much water. If you bought your orchid from a professional nursery or garden center, though, you’re usually good to go—those are typically potted correctly from the start!