Marigolds (or *Tagetes*, if you want to get fancy) are the absolute workhorses of the garden. They’ll bloom their heads off for months, only stopping once the first frost hits. But if you’re like me and can’t get enough of those vibrant colors, you’re probably wishing for an even longer season. Good news: you don’t have to just wish for it! By starting your seeds indoors, you can get a massive head start on spring. Here’s how to get those babies growing.
The Best Time to Start Your Seeds
Since marigolds are not frost-hardy, you usually can’t sow them directly outside until late April. If you want a serious jump on the competition and want to see that bloom time happen much earlier, you’ve got to act sooner. While our heated homes provide plenty of warmth, you also need to wait until the days get a bit longer and brighter so the seedlings don’t get “leggy.”
Late February is usually the sweet spot, though early March works great too. You might see some folks recommending January, but I’d take that with a grain of salt. Starting that early usually means you’ll have to repot them multiple times, and they’ll end up taking over your entire windowsill before it’s even warm enough to move them!
What You’ll Need for Indoor Propagation
- A packet of seeds from the store
- Or, if you were prepared, seeds harvested from last fall
- A large seed tray or several small pots
- Seed-starting mix
- Clear plastic bags or plastic wrap
- A spray bottle
- A dibber (or a pencil works in a pinch!)
- Small individual pots (about 3 inches wide) for transplanting
- Standard potting soil mixed with a little sand
Step-by-Step Sowing Guide
- Fill your seed tray with the seed-starting mix.
- Scatter the seeds evenly across the surface.
- Press the seeds down gently. Marigolds are light-germinating, meaning they need light to sprout! If you cover them at all, use only a very fine dusting of soil—no thicker than the seed itself.
- Mist the soil thoroughly with your spray bottle.
- Cover the tray with a plastic bag or plastic wrap to create a mini-greenhouse effect.
- Place the tray in a bright spot that stays around 65-68°F (18-20°C), but keep it out of harsh, direct sunlight for now.
The “In-Between” Step: Pricking Out
You’ll start seeing green sprouts in about two weeks. Once your seedlings have 2 or 3 pairs of true leaves (or are about 4 inches tall), it’s time to “prick them out.” Use your dibber to carefully lift the root ball without damaging it. Pick the strongest, healthiest-looking seedlings to move forward with—sadly, it’s best to toss the weak ones.
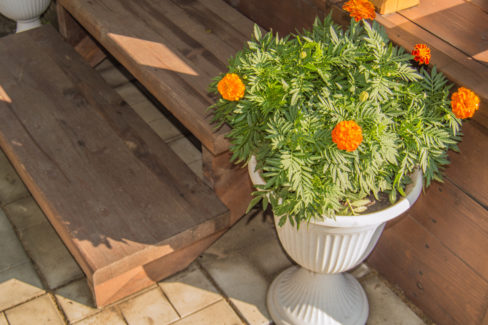
For this stage, use regular potting soil mixed with a bit of sand for better drainage. Keep your young plants happy indoors until the planting window opens up in mid-May. Once the danger of frost has passed, you can plant them in a sunny spot in your garden beds or move them into containers on the patio.
Pro Tip:
If you want to skip the tedious pricking out process, just skip the big tray! Plant 3 or 4 seeds directly into small individual pots. Once they sprout, just keep the strongest seedling and pull the others out. Easy peasy!