If you’ve already got some gorgeous hydrangeas brightening up your yard, I have great news: you can easily grow even more for free! While you can always divide a large plant, propagating from cuttings is a super rewarding way to start a whole new hydrangea family. Here is my go-to guide on how to take cuttings and get them to root like a pro.
Taking Your Cuttings
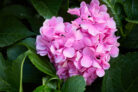
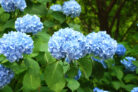
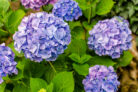
Timing is everything when it comes to pruning hydrangeas for propagation. You want to catch them when the stems are full of life and sap—usually June and July are the “sweet spot.” Look for lush, green stems that are about 6 to 8 inches long. Pro tip: pick a parent plant that is already a showstopper with plenty of blooms. Since the new plant will be a clone, you’re much more likely to get those same stunning flowers later on!
Grab a sharp pair of garden shears, and make sure to disinfect the blades first so you don’t introduce any bacteria to the fresh cuts. You’ll want to cut the stem at an angle, focusing only on “new wood” (this year’s growth). These fresh, green stems develop new roots much faster than the old, woody branches.
What to look for in a perfect cutting:
- A lush, green stem from this year’s growth
- 6-8 inches from a healthy, vibrant plant
- Firm, sap-filled material (not wilted)
Rooting and Caring for Your New Hydrangeas
Once you’ve snipped your stems, it’s time to prep them for their new home. Start by cutting off any flower heads and the very tip of the stem. Make an angled cut just above a pair of leaves. Then, strip away the lower leaves, leaving only one pair at the very top. I usually trim those remaining leaves in half—this tells the plant to stop worrying about foliage and put all its energy into growing roots.
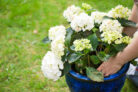
Next, grab a small pot and fill it with coconut coir or a high-quality seed-starting mix. Poke the cutting about halfway into the soil and give it a good drink of water. To create a mini-greenhouse, pop a clear plastic bag over the pot. Just remember to peek inside every day or two to let in some fresh air and check if it needs more water. Once you see new little leaves sprouting and feel some resistance when you give the stem a tiny tug (that means roots are forming!), your hydrangea is ready to be moved to its permanent spot once the weather is warm.