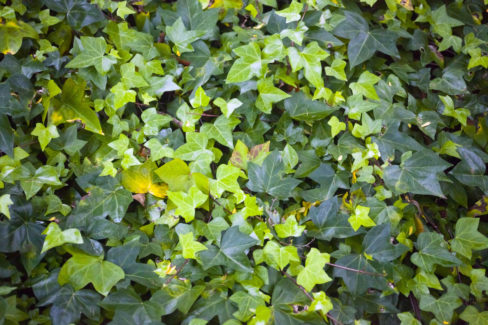
First things first: I promise you, anyone can propagate ivy. It’s one of those plants that just *wants* to grow, and since most of us have plenty of it trailing around, you’ll have more than enough material to work with. All you need is a healthy mother plant or a few seeds.
Ready to turn one plant into a dozen? Here’s the lowdown on how to get it done.
Propagation Methods
When it comes to ivy, you’ve basically got three ways to go about it:
- Layering (the easiest way!)
- Rooting stem cuttings
- Growing from seed
Layering
If you have ivy growing in your garden with long, trailing vines, you can grow new offshoots right where they sit. Ivy is naturally programmed to sprout roots whenever a vine touches the soil—you’ve probably seen it happen on its own! But you can definitely give it a little nudge to speed things up. The best time to do this is during the summer months.
- Pick a long, healthy vine from this year’s growth.
- Strip the leaves off a few spots along the vine, about 12 to 15 inches apart.
- Bend the vine down to the ground and dig a shallow little trench underneath it.
- Secure the leafless spots into the soil using something like landscape staples or tent stakes.
- Cover those spots with a bit of fresh humus or potting soil.
- Make sure the tip of the vine is still peeking out of the ground.
Over the summer, new roots will develop at those contact points. By next spring, you can simply snip the new plants away from the mother vine and move them to their new spots in the garden.
Pro Tip: To encourage faster rooting, use a clean knife to gently nick the underside of the vine (the part touching the soil) at each stripped spot.
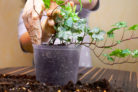
Rooting Cuttings
You can take “tip cuttings” (the ends of the vines) or “stem cuttings” (middle sections). Each piece should be about 4 inches long and free of those little “clingy” aerial roots. Look for a healthy, strong stem that’s just starting to feel a bit woody. If you’re using middle sections, make sure you remember which end is “up”—if you plant them upside down, they won’t root!
- Strip the bottom leaves off and let the cuttings dry out for a few hours.
- Grab a brown glass jar (or wrap a clear one in foil to keep the light out).
- Pop the cuttings into the water, bottom-end down.
- Place the jar on a warm, bright windowsill, but keep it out of direct, scorching sunlight.
- Keep an eye on the water level and top it off so the ends stay submerged.
- Once you see roots that are about an inch long, it’s time!
- Plant your new babies into small pots with loose, well-draining soil.
Pro Tip: You can actually skip the water step and stick the cuttings directly into pots of soil. In February or March, you can even try planting 8-inch cuttings directly into your garden beds.
Growing from Seed
Once an ivy plant reaches its adult stage, it blooms every year and produces small berries. These ripen around March or April. You can harvest these seeds, but wear gloves! The berries are very toxic.
- Clean the pulp off the seeds.
- Put the seeds in a plastic bag with some damp sand.
- Stick the bag in the veggie drawer of your fridge (aiming for 25°F to 40°F).
- Let them “chill” (stratify) for 4 to 6 weeks. They won’t sprout without this cold snap!
- Check occasionally to make sure the sand stays damp and isn’t getting moldy.
- Fill a seed tray with standard seed-starting mix.
- Spread the seeds out evenly and cover them with a very thin layer of fine soil or sand.
- Press down gently so the seeds have good contact with the dirt.
- Mist them with a spray bottle and keep the soil consistently moist.
- Place them in a bright spot at about 68°F to 73°F.
- Once the first leaves appear, move them to a slightly cooler spot (around 65°F).
- When they have two pairs of leaves, you can “prick them out” and move them into their own pots with a little fertilizer.
Caring for Your Young Plants
Since these little guys aren’t fully hardy yet, they should spend their first winter somewhere warm indoors. Wait until March to plant your ivy out in the garden. Once they’re in the ground, give them a good trim to encourage them to branch out and get bushy.
Until then, keep them watered and maybe give them a small trellis to climb. If you see roots poking out of the bottom of the pots, it’s time to repot them!