Propagating ivy is honestly one of the easiest wins you can have in the gardening world. It’s low-effort, doesn’t require a PhD in botany, and is super rewarding. Really, the hardest part is just deciding which method you want to use! Here’s a quick breakdown of the best ways to grow your ivy collection.
Four Simple Ways to Propagate
Even though the price of ivy is usually pretty budget-friendly, there’s something special about propagating your own plants. It’s a fun project and, let’s be real, free plants are the best plants. You can grow a brand-new ivy from:
- Cuttings
- Runners (natural offsets)
- Layering
- Seeds
The best time to propagate depends on which of these paths you choose.
Cuttings
If you’re working outdoors, spring or fall are your best bets for cuttings. If you’re keeping them indoors, you can do this year-round (though they might struggle a bit during those dark, gloomy months from November to February). Just snip off a young shoot about 6 inches long. Try to find one that hasn’t developed clinging roots yet. Strip off the bottom leaves and give the end of the stem a tiny nick. You can also take a longer, slightly woody vine and cut it into several smaller sections.
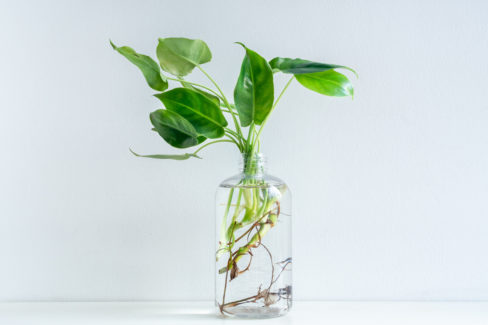
You can let your cuttings root in a glass of water in a bright, warm spot. Once those roots hit about an inch long, move them into a small pot. Alternatively, you can stick them straight into potting soil—just keep the dirt moist and be patient while you wait for that first sign of new growth.
Pro Tip:
If you’re cutting a long vine into sections, make sure you know which end is “down.” If you plant them upside down, those roots aren’t going to grow!
Runners
Ivy loves to spread out, especially when it’s used as a groundcover. Whenever those long vines touch the dirt, they naturally want to take root and create a runner. If you find one that’s already established itself, just snip it away from the mother plant and move it to its new home.
Layering
This is basically the “DIY” version of the runner method. Instead of waiting for the plant to do it, you’re helping it along:
- Summer is the perfect time for this.
- Pick a long, one-year-old vine. Every 12-15 inches, strip a few leaves and lightly nick the stem.
- Bend the vine down to the ground and tuck it into a small trench.
- Pin the stripped sections into the soil (tent stakes or bent wire work great for this).
- Cover those spots with some good compost or humus.
By next spring, your new baby plants will have enough roots to be cut free and moved.
Seeds
Once ivy reaches its mature stage, it starts to bloom and produce berries. These berries contain seeds you can actually grow. Harvest them in the spring, clean off the pulp, and keep them in the fridge (around 40°F) for 4-6 weeks to “wake them up” (stratification). After that, you can sow them indoors or out.
A Quick Warning:
Be super careful with ivy berries and seeds—they are highly toxic. Keep them far away from kids, as eating even a few berries can be extremely dangerous.
Caring for Your New Plants
If you’ve started your ivy indoors, it won’t be hardy enough to survive its first winter outside right away. Keep your new plants inside for the first year, give them regular water, and repot them if they start outgrowing their space.