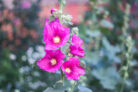
While you don’t *technically* have to prune your hollyhocks, giving them a good trim comes with some pretty great perks. If you want to keep your garden looking sharp and your flowers blooming beautifully, knowing when and how to cut them back is key. Here’s the lowdown on how to handle your hollyhocks so you can enjoy those stunning stalks year after year.
Regular pruning isn’t a must
The good news is that hollyhocks aren’t high-maintenance divas. You can actually get away without pruning them at all if you’re feeling lazy. During their first year, you definitely want to leave them alone anyway—they’re busy just growing leaves and establishing themselves. Give them that first year to really settle in; you won’t even need to think about your shears until year two.
Now, if you’re trying to get a head start by starting your hollyhocks indoors, you might see blooms a bit earlier in the spring. But honestly? Indoor starts can be a bit of a headache. For one, potted hollyhocks develop long taproots fast, meaning they’ll outgrow their containers before you know it.
Plus, indoor-raised plants tend to be a little “soft.” They don’t have the same cold hardiness as plants that toughed it out in the garden from the start. If you go the indoor route, just keep in mind they might not be quite as rugged as their outdoor-born cousins.
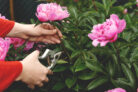
Pruning after the bloom
The best time to prune your hollyhocks is right after they finish blooming, but *before* they start dropping seeds. Why? Because cutting them back at this stage tricks these typically biennial plants into coming back for another round next year. The second-year blooms might not be quite as massive as the first, but they’ll still put on a gorgeous show.
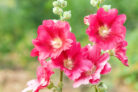
Just a heads-up: as hollyhocks get older, they can get a bit fussy. They become more prone to nutrient deficiencies or diseases like rust. Keep a close eye on those hollyhock leaves—they’ll usually tell you pretty quickly if the plant is feeling under the weather.
How to prune like a pro
Hollyhock blooms aren’t just pretty to look at in the garden; they’re incredibly versatile. You can pop them in a vase to brighten up a room, or even head to the kitchen with them! Believe it or not, both the flowers and roots are edible. The petals make a beautiful garnish for salads or desserts, and the roots can actually be brewed into a tea.
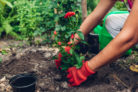
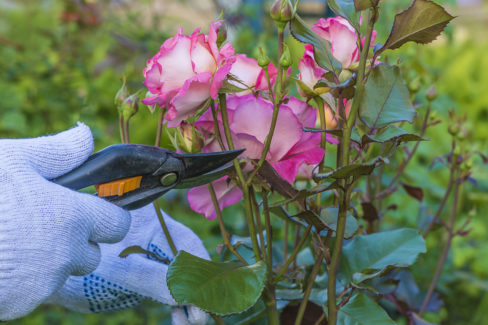
Step-by-step pruning:
- Time it right: Cut back during or immediately after the blooming phase.
- Use the right gear: Grab a pair of sharp, clean garden shears.
- Make the cut: Snip the flower stalks down generously.
By pruning, you’re doing the plant a favor and getting some cool materials for your home at the same time. If you want to use the flowers for cooking or decorating, don’t wait for them to wilt! Snip them while they’re fresh, fully open, and looking their best.