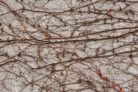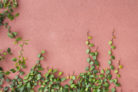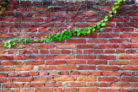
When ivy has overstayed its welcome on your exterior walls, you’re in for a bit of a project. Those tiny aerial roots the plant uses to climb might look delicate, but they pack an incredible punch when it comes to grip.
Take it Slow and Steady
The longer ivy has been allowed to call your house home, the bigger and tougher it gets. Over time, those aerial roots practically suction themselves to the surface, and the main vines become woody and thick. Because of this, removing ivy from a wall isn’t a “one and done” job—it’s a multi-step process. You’ll want to be patient and careful; if you rush and just yank everything off, you risk damaging your siding or stucco, which could lead to a pricey repair job.
Tools and Safety Gear
Before you head outside, make sure you have these supplies ready to go:
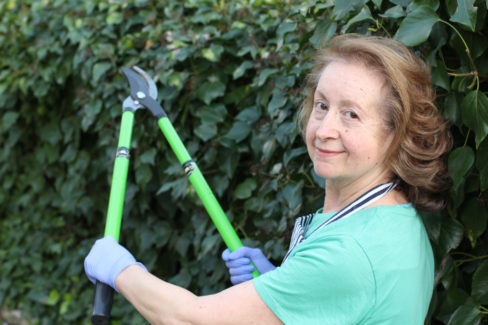
- Sharp, sanitized cutting tools (hand pruners, loppers, or even a small saw for thick vines)
- A sturdy putty knife or scraper
- A stable, high-reaching ladder
- A shovel or spade
- Large lawn bags or bins for disposal
- Stiff scrub brushes and a wire brush
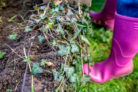
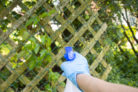
Safety first! Ivy is toxic and can cause skin irritation, so suit up in long sleeves, pants, and heavy-duty gloves. I also recommend a mask and safety glasses to keep dust and debris out of your lungs and eyes.
Tearing Down the Vines
Start by cutting the vines right at the base near the ground. If you’re dealing with a massive wall of green, it helps to cut the vines into smaller, manageable sections every few feet. Then, working from the top down, gently pull the vines away from the masonry. If a section is being stubborn, slide your putty knife behind it to help pry it loose.
Make sure to bag up the debris as you go. You’ll want to dispose of ivy in your regular trash or take it to a professional green waste site. Whatever you do, don’t put it in your compost pile—ivy is a survivor and will likely just start growing again right in your mulch!
Pro Tip:
Give the wall a good soak with a garden hose or wait for a rainy day to start this project. Moisture softens the vines and roots, making them much easier to peel away.
Cleaning Up Root Residue
Once the main vines are gone, you’ll notice that those pesky little rootlets are still stuck to the wall. They usually break off rather than pulling out, leaving behind a fuzzy, unsightly mess. You can scrub most of this away with a stiff brush. While a pressure washer is tempting, be extremely careful—too much pressure can blast the finish right off your house. Finish up by wiping the area down with a mild cleaning solution to get rid of any lingering marks.
Digging Out the Roots
The final step is to deal with the source. Ivy roots can reach down about 2 feet into the soil. Use your spade to dig out the entire root system. You really want to be thorough here; if you leave chunks of root behind, there’s a good chance you’ll see new ivy shoots popping up again next season!