Propagating a European Beech (Rotbuche) isn’t exactly a walk in the park, but don’t let that discourage you! If you’re willing to follow a few simple rules and pack a little patience, growing your own majestic beech tree can be a super rewarding project.
Propagating European Beech
Just like most of our favorite garden plants, there are a few different ways to get more European Beeches in your yard:
- Starting from beechnuts (seeds)
- Taking cuttings
- Air layering
Sowing Beechnuts
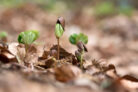
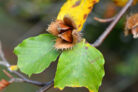
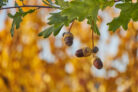
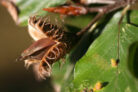
First things first: you’ll need viable seeds. Head out and collect as many dry, firm beechnuts as you can find. Here’s a pro tip: drop them into a bowl of water. Any duds will float to the top, so you can just skim those off and toss them. Dry off the “sinkers,” and you’re ready for stratification.
Stratification sounds fancy, but it just means giving the seeds a “cold treatment” to break their natural dormancy. If you plant your beechnuts directly outdoors in the fall, Mother Nature handles the winter chill for you. If you’d rather wait until spring, just pop the seeds in a bag in the fridge for a few months. When spring rolls around, plant them in pots filled with nutrient-rich, well-draining, slightly loamy soil. Make sure to cover them up well—beech seeds need darkness to germinate. Also, if your pots are outside, definitely cover them with a wire mesh or hardware cloth. Trust me, the local mice and squirrels think beechnuts are a five-star snack!
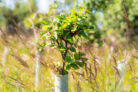
Growing from Cuttings
This method really only works with younger beech trees. In the spring, snip off a few soft, non-woody shoots. Strip the leaves off the bottom ends and dip them into some rooting hormone. Trim the top of the cutting slightly and tuck it into a pot with loose seed-starting mix. It’s a good idea to give the little guy a stake for support. Keep the soil consistently moist, but be careful not to drown it—drainage is key! If you start your cuttings in the summer or early fall, make sure to move them to a frost-free spot once winter hits.
Propagating by Air Layering
Air layering is a bit more “mad scientist,” but it’s a classic technique. Here’s the breakdown:
- In spring (or even summer), find a relatively young branch and make a diagonal slit in it while it’s still attached to the tree.
- Prop that cut open slightly with a tiny wedge or toothpick so it doesn’t heal shut.
- Dab some rooting hormone or “willow water” onto the wound.
- Wrap the area loosely with damp moss or wood wool.
- Cover the whole bundle with plastic wrap to keep the moisture in.
Now comes the hard part: waiting. It takes a good while for roots to form at the cut site. You’ll know you’ve succeeded once the branch starts pushing out fresh new leaves!