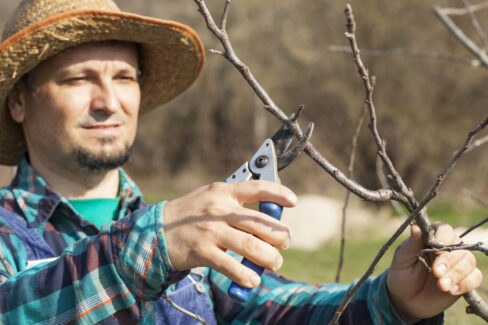
Regularly pruning your apple tree is the secret sauce to helping young trees thrive. If you’re wondering when to start or how to actually make the cuts, don’t worry—I’ve broken it down into simple, easy-to-follow steps for you.
When to Prune Your Apple Trees
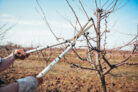
Pruning an apple tree is a classic winter chore. You’ll want to wrap it up by the end of February at the latest, right before the birds start nesting. Aim for a mild, frost-free day to head outside. While you *can* technically prune in the summer, if you’re new to fruit trees, winter is much easier. Without all those leaves in the way, you can actually see the structure of the branches and know exactly what you’re doing.
Shaping the Canopy
Getting the shape of the canopy right is a big deal. If you put in the work to train the tree for the first 6 to 10 years, it’ll be much more “forgiving” if you miss a year later on. Once the framework is solid, you can look forward to some seriously heavy harvests. During these early years, we prune back the branches to balance the roots with the top growth, which helps build a sturdy, compact skeleton for the tree.
How Pruning Affects Growth
The way you cut determines how the tree reacts. If you do a heavy, uniform prune, you’re leaving behind only a few buds, which will then explode into a few very strong, vigorous shoots. On the flip side, a light prune leaves many buds, resulting in lots of shorter, weaker shoots. By mixing it up—pruning some shoots heavily and others lightly—you can balance out the tree’s energy.
Pruning Young Apple Trees
On a young apple tree, the higher branches usually grow faster than the lower ones. To keep things even, you should prune them all back to the same level. This encourages the tree to distribute its energy more equally across all the branches.
The Initial Planting Cut
The very first trim a tree gets after it’s put in the ground is called the planting cut. If you plant in the fall, do this in early spring. If you’re planting in the spring, do it right away.
- Pick one strong, upright shoot to be your central leader (the main “trunk” extension).
- Choose 2 to 4 main scaffold branches. Ideally, these should grow out at a 50° angle. If they’re too steep, you can use spacers to push them out; if they’re too flat, tie them up to a more upright position.
- Prune these scaffold branches back by about two-thirds so they are all at the same height (base this height on the weakest branch).
- Remove any other competing shoots entirely.
Maintenance in the Following Years
For the next few years, you’ll follow a similar pattern until the canopy structure is fully established. Each year, you’ll prune a little less than the year before. Starting in the second year, you’ll also need to prune the side growth coming off those main scaffold branches. In mid-summer, be sure to remove any “competitor” shoots that are trying to outgrow your main leader. Also, clear out any branches growing from the top of a limb back toward the center of the tree.
Pruning Side Growth
- Shorten shoots near the tips to about 4–6 buds.
- Shorten shoots closer to the base to about 6–10 buds.
- Don’t touch the fruit spurs (where the apples grow!).
- In the winter, prune back any new growth on these side branches to a bud that faces outward and horizontally.
Training Secondary Branches
By year 3 or 4, the tree enters its training phase. Now, you want to develop secondary branches. Look for shoots growing just below the tips of your main scaffold branches. Avoid anything growing at weird angles. Your lowest secondary branch should be at least 2 feet (60 cm) from the trunk, and you should aim for about 2 to 2.5 feet (60–80 cm) of space between the secondary branches themselves.
Maintenance Pruning
Once you’ve spent 6 to 10 years building a beautiful canopy, you can’t just walk away! Regular maintenance is key to keeping the tree healthy. Keep the center of the tree open and airy so light can reach the fruit. You don’t need to prune the main branches as aggressively as you did during the training phase, but you should thin out the canopy once a year. Make sure to remove:
- Any diseased, damaged, or dead wood.
- Old, worn-out branches that aren’t producing well.
- Branches that are too crowded or growing into the center.
- Anything interfering with the tree’s structure (like water sprouts or competing leaders).
Don’t let more than 4 years go by without a good thinning. If the tree gets too overgrown, you might need to look into rejuvenation pruning.
Pro Tip: Get Creative with the Scraps!
Winter pruning leaves you with a lot of wood. What should you do with it? Thick logs are great for the fireplace, and thinner twigs can be shredded for compost. But you can also get crafty! Apple wood is beautiful for DIY projects like rustic wall shelves or picture frames. Or, honestly, just stick a few nice-looking branches in a tall vase for some easy, natural home decor.