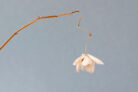
If you’ve noticed a fuzzy white coating on your orchid’s potting mix or those upper aerial roots, you’re likely dealing with a mold problem. Because mold is a pathogen that can spread faster than you’d think, it’s important to act quickly to save your plant. Here’s the lowdown on why mold shows up and how you can kick it to the curb to keep your orchid thriving.
Mold Growth on Orchids
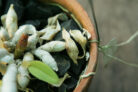
That white film on the substrate or roots is a classic sign of mold. Since it can spread to your other green friends, your first step should be to move the affected orchid away from your other plants. Keep it in “quarantine” until you’ve completely cleared up the issue.
Mold vs. Mildew
Don’t mistake common mold for powdery mildew! Mildew usually looks like a dusty, grayish-white flour coating on the leaves. Mildew is a specific fungal infection that often responds well to a simple milk-and-water solution.
Also, keep an eye out for pests. Critters like spider mites or mealybugs can leave behind white, sticky residues or webs on the leaves that might look like mold at first glance.
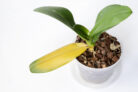
What Causes Mold?
Mold absolutely loves damp, stagnant environments. If you see a white layer forming on the potting media, it’s a major red flag that things are too wet inside the pot. Usually, this is caused by overwatering or poor drainage (standing water).
How to Treat the Mold
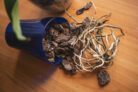
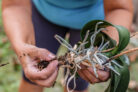
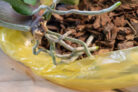
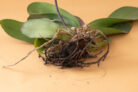
To stop those spores in their tracks, you need to act fast. Your best bet is to repot your orchid into fresh, clean substrate. Carefully remove the plant from its old pot and shake off every bit of the old mix clinging to the roots. Toss that moldy old bark in the trash—don’t put it in your compost pile, or you’ll just spread the mold around your garden!
While the plant is bare-rooted, it’s the perfect time for a root trim. Use a sharp, sterilized knife to snip away any mushy, rotten, or visibly moldy roots. Pro tip: Lightly dust the cut ends with a little cinnamon or charcoal powder—it acts as a natural disinfectant.
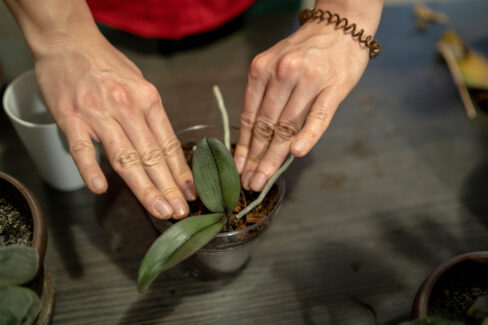
Ideally, move your orchid into a brand-new pot. If you want to reuse the old one, make sure to scrub and disinfect it thoroughly first. Pot it up with fresh, dry orchid mix. Hold off on a full soak for a few days; for now, just lightly mist the surface roots to keep it hydrated.
Preventing Mold in the Future
Since mold thrives on moisture, getting your watering routine right is the best defense. This is where most orchid parents run into trouble! Both “drought” stress and overwatering can weaken these exotic beauties. Here are my top tips for keeping things balanced:
- Only soak your orchid when the potting mix has almost completely dried out.
- Say no to “wet feet.” Use a layer of expanded clay pebbles (LECA) at the bottom for drainage and always let excess water drain out completely after watering.
- To keep humidity high without soaking the roots, mist the aerial roots and leaves with lukewarm water every couple of days.
- Placing small bowls of water near your plants is another great way to boost ambient humidity naturally.